Module page from the User portal: Rate and favorite a module; add to boards; view timestamp video commentary; enroll others in module; see completion status, tags, content window, title, presenter; view full screen/open in a new tab.
December 07, 2022
A module is a piece of media (e.g. files, events, YouTube videos, links to other websites, Training ArcadeⓇ games, micromodules quizzes, RehearsalⓇ modules, and CenarioVRⓇ simulations) in a course. The Module Page provides information about a module.
Navigating to a Module Page
Select either a standalone module or a module in a course. Once selected, the Module Page will open.
Related: To learn how to set up and modify the module elements on the module page, view How to Edit/Fill out Module Details pages for Uploaded Modules.
Basic Module Page Features
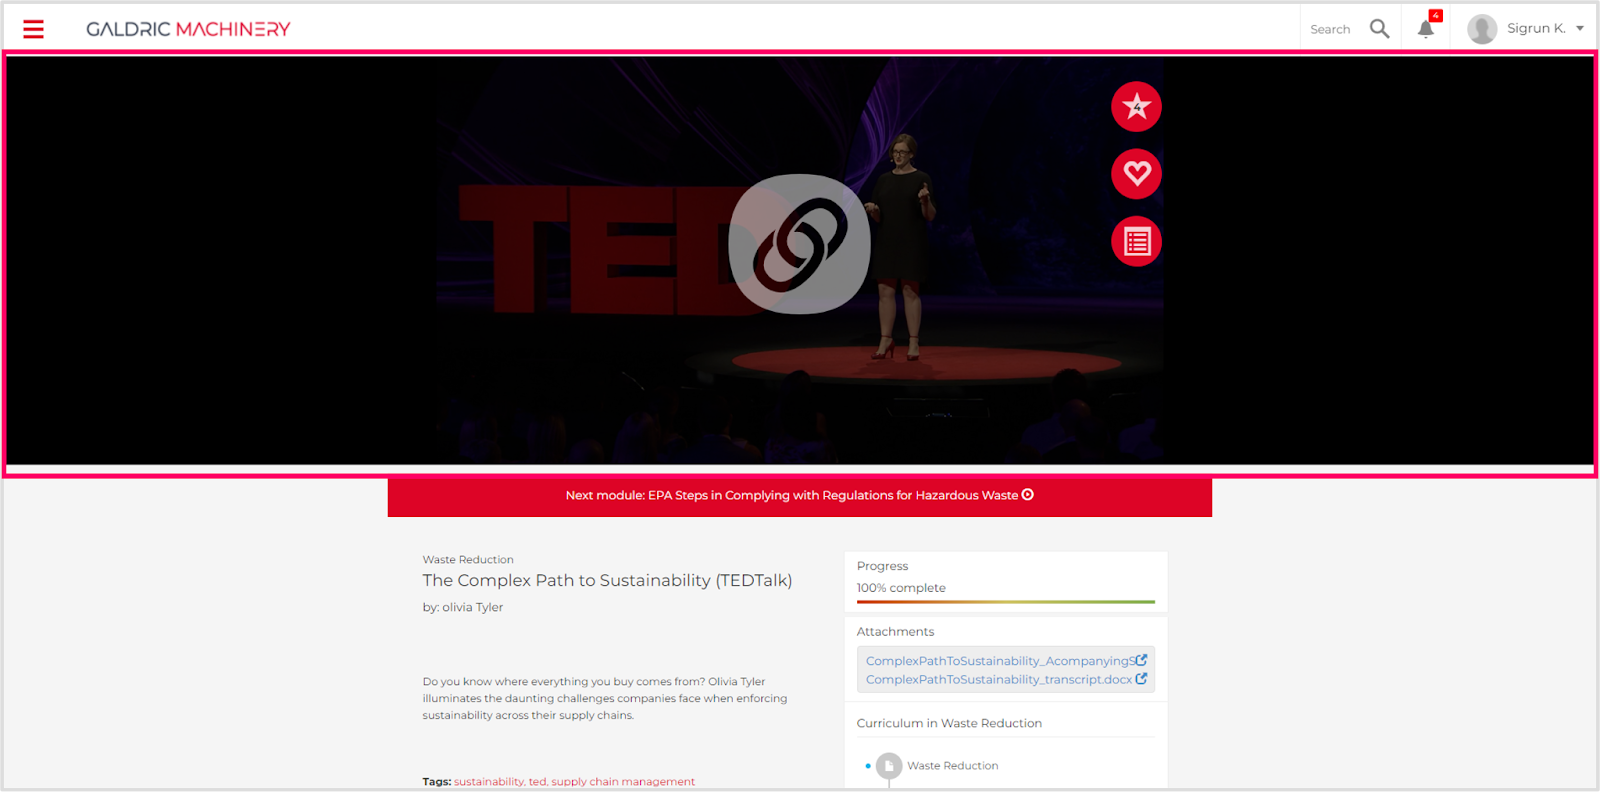
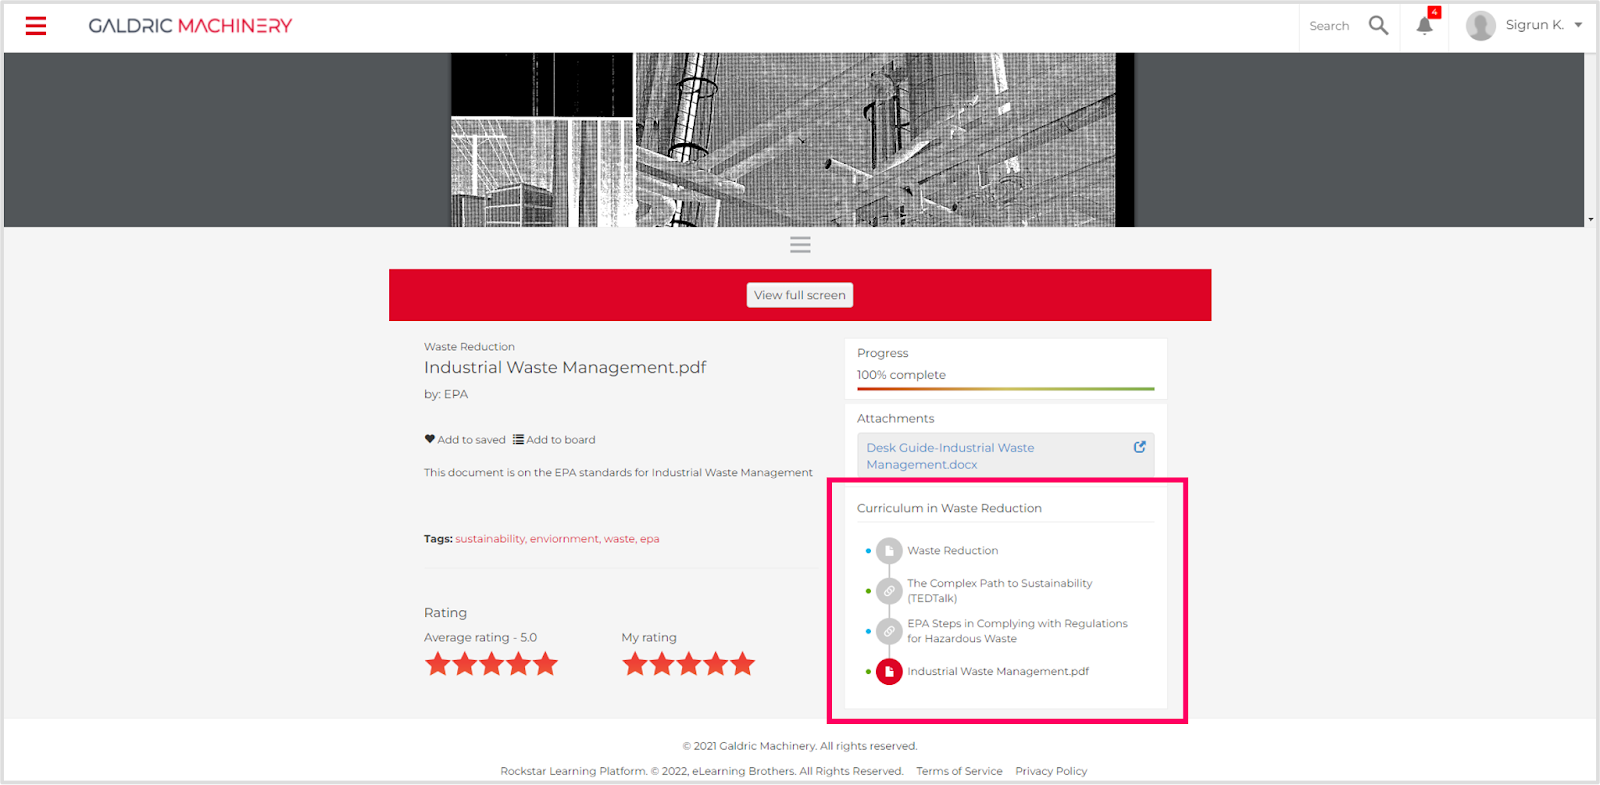
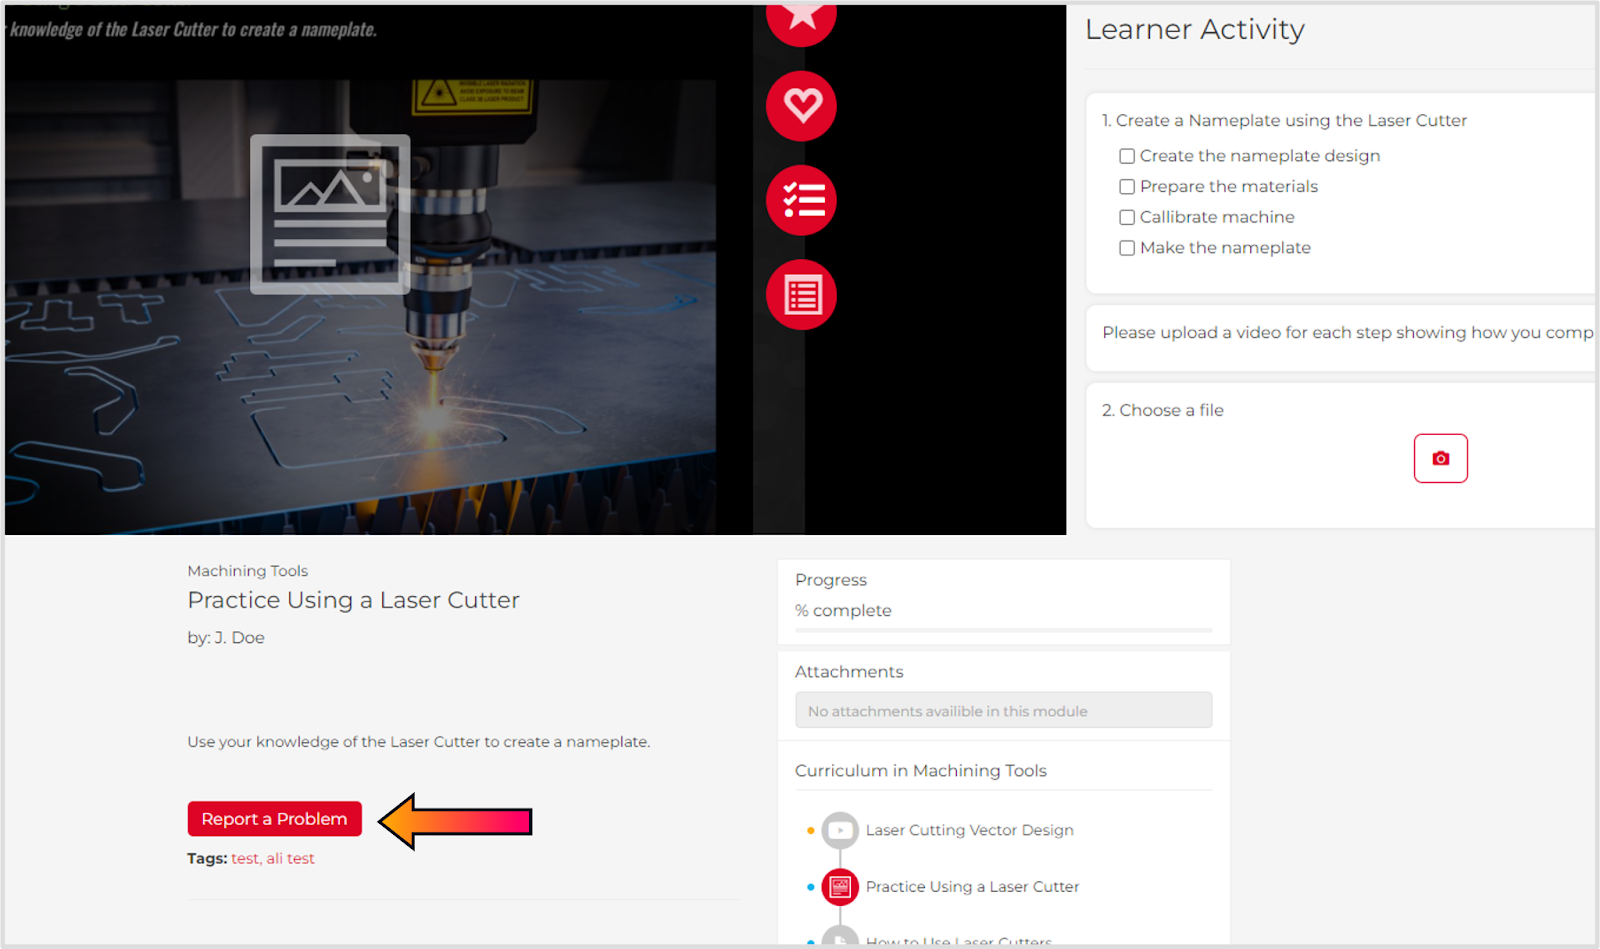
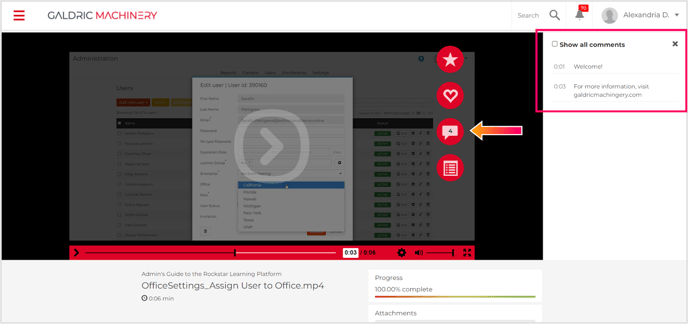
Content Window: The main window is where the module’s content (files, links, games, videos, etc.) will appear.
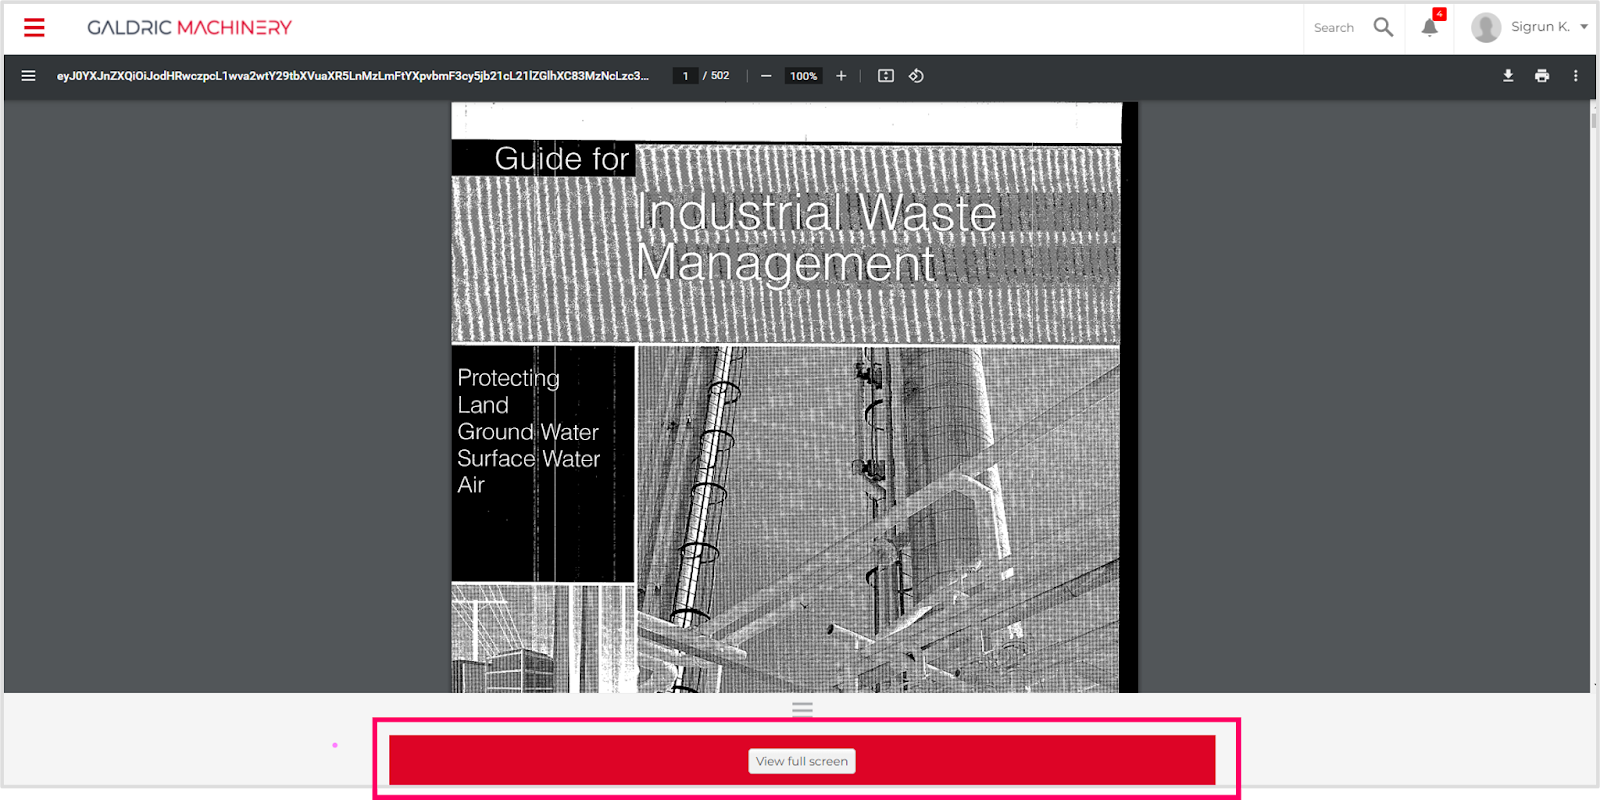
View Full Screen: While your content will load in the content window by default, SCORM files, microlearning modules, YouTube links, and other link uploads can be opened in a new window. This button will appear either overlaying the content window or underneath the content window.
Caution: You may need to disable your popup blocker to allow the module to open in a new tab.
Add to Saved: This button will either appear in the section below the course window, or as a heart icon overlaying the content window. Selecting this button will add the module to the “Saved” tab on the homescreen so that it can be easily accessed later.
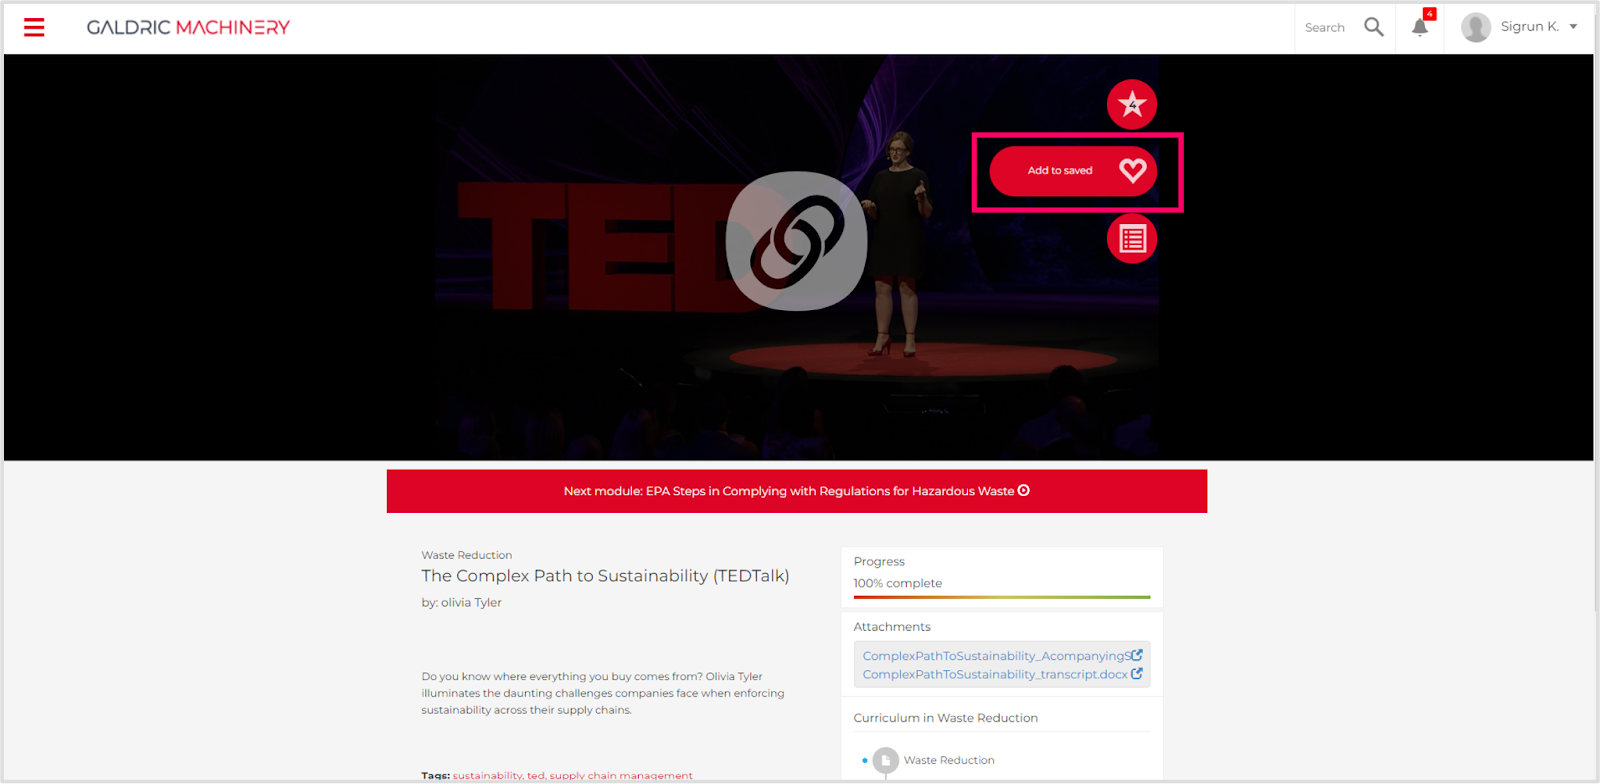
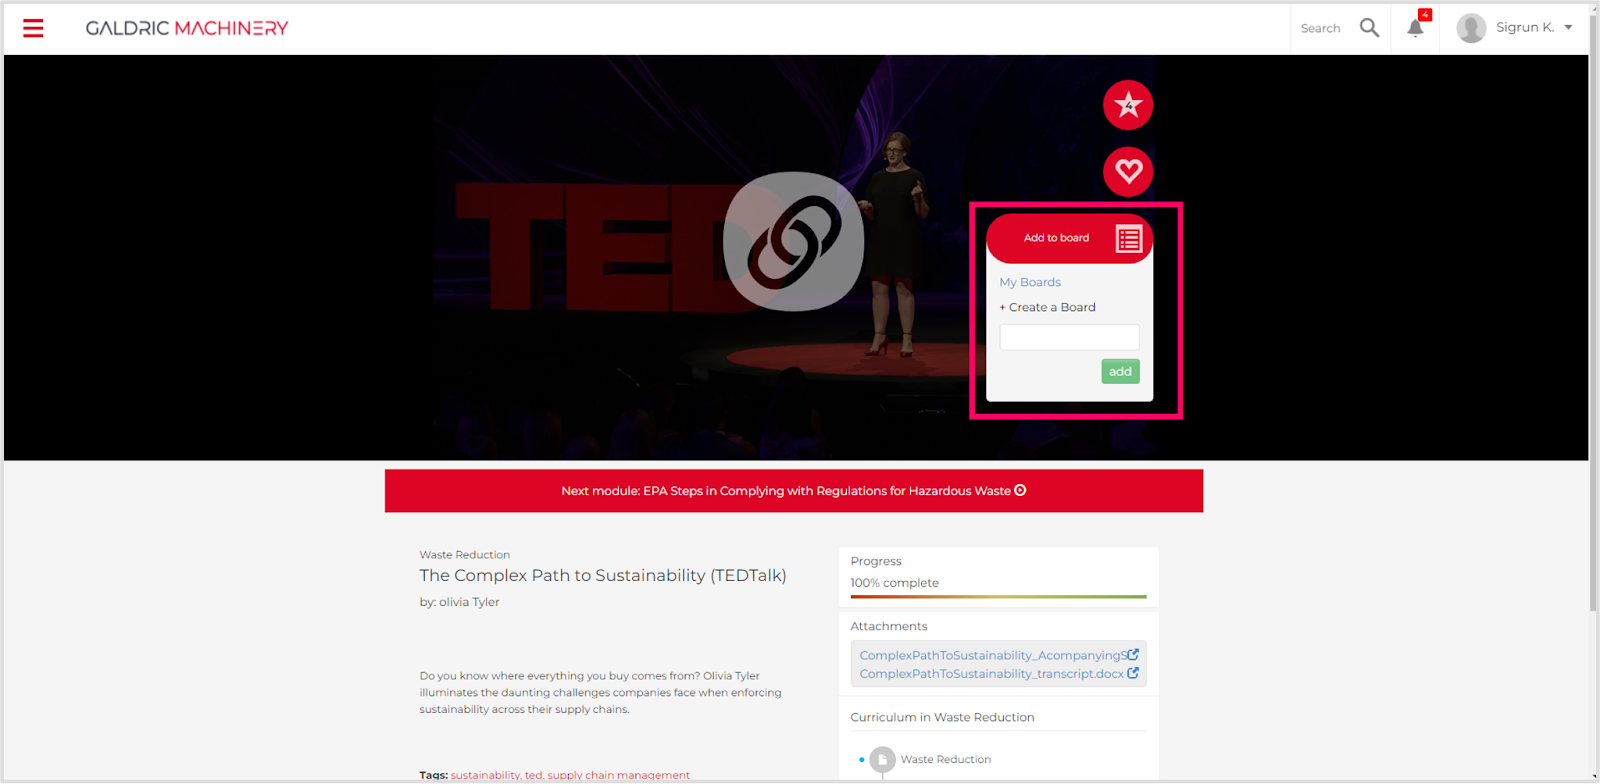
Add to Board: This button will either appear in the section below the course window, or as a checklist icon overlaying the content window.
Rate the Course: Users can rate the module out of 5 stars with either the star icon overlaying the content window or the “Rating” section below the “Enroll Others” button. The overall rating of the course is visible next to learners’ personal rating underneath the content window.
Note: If the rating button is overlaying the module, then the overall rating will be displayed inside the star and as white stars when hovering over the icon. Once a leanerner has rated the course, their rating will appear as yellow stars rather than the average rating.
Related: To learn how to add and remove ratings from your platform, visit the General Settings Article.

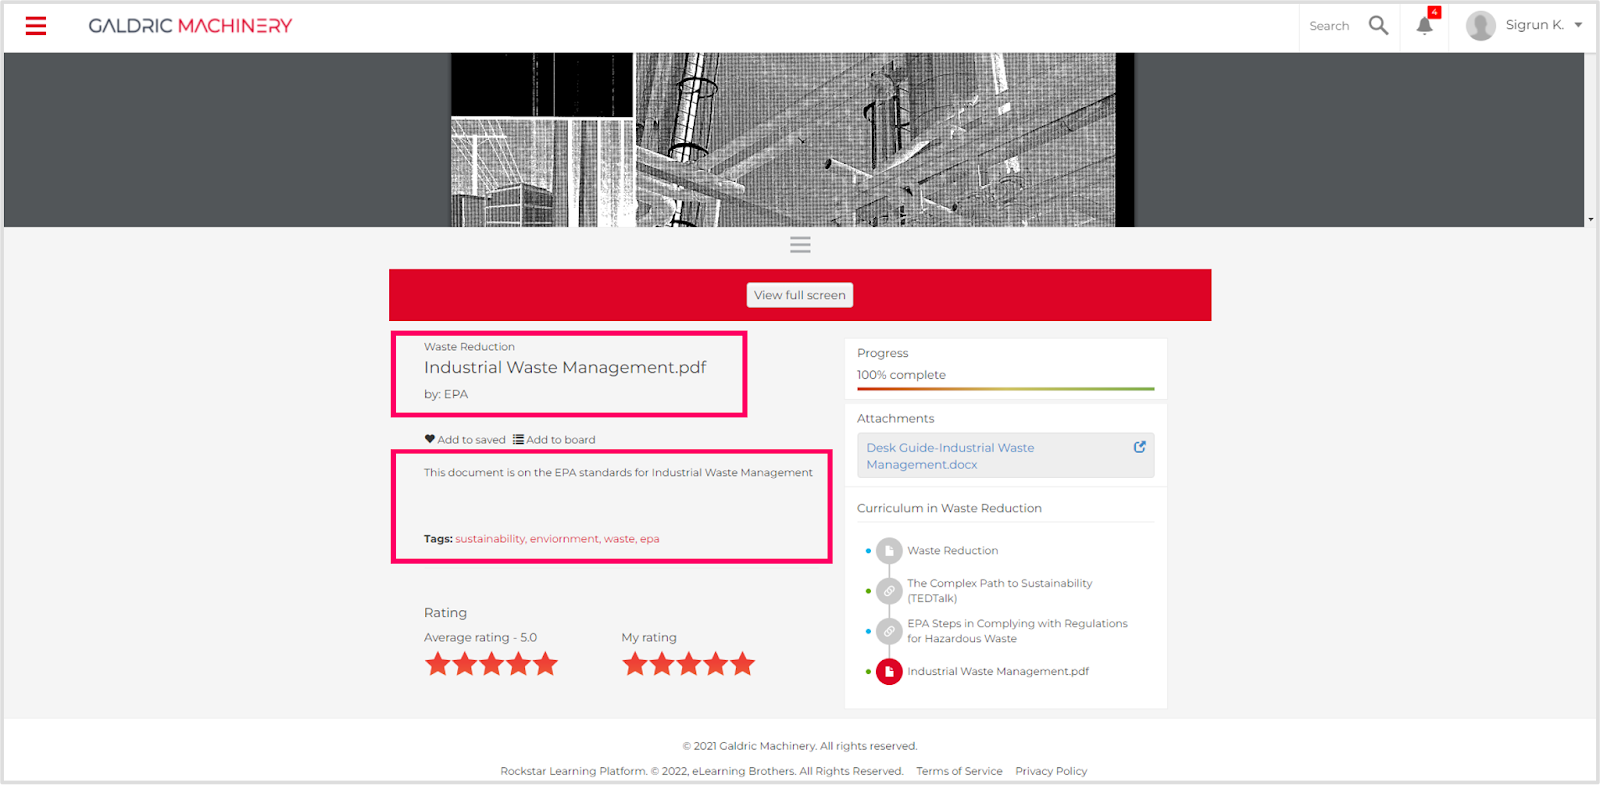
Course Title: The title of the course that the module belongs to is directly under the content window.
Module Title: The title of the module is directly under the course title.
Presenters: Any presenters added to a module will appear underneath the module title.
Module Description: The module description will display in the module details section below the module.
Tags: Any search tabs admins added to the module will appear under the description.
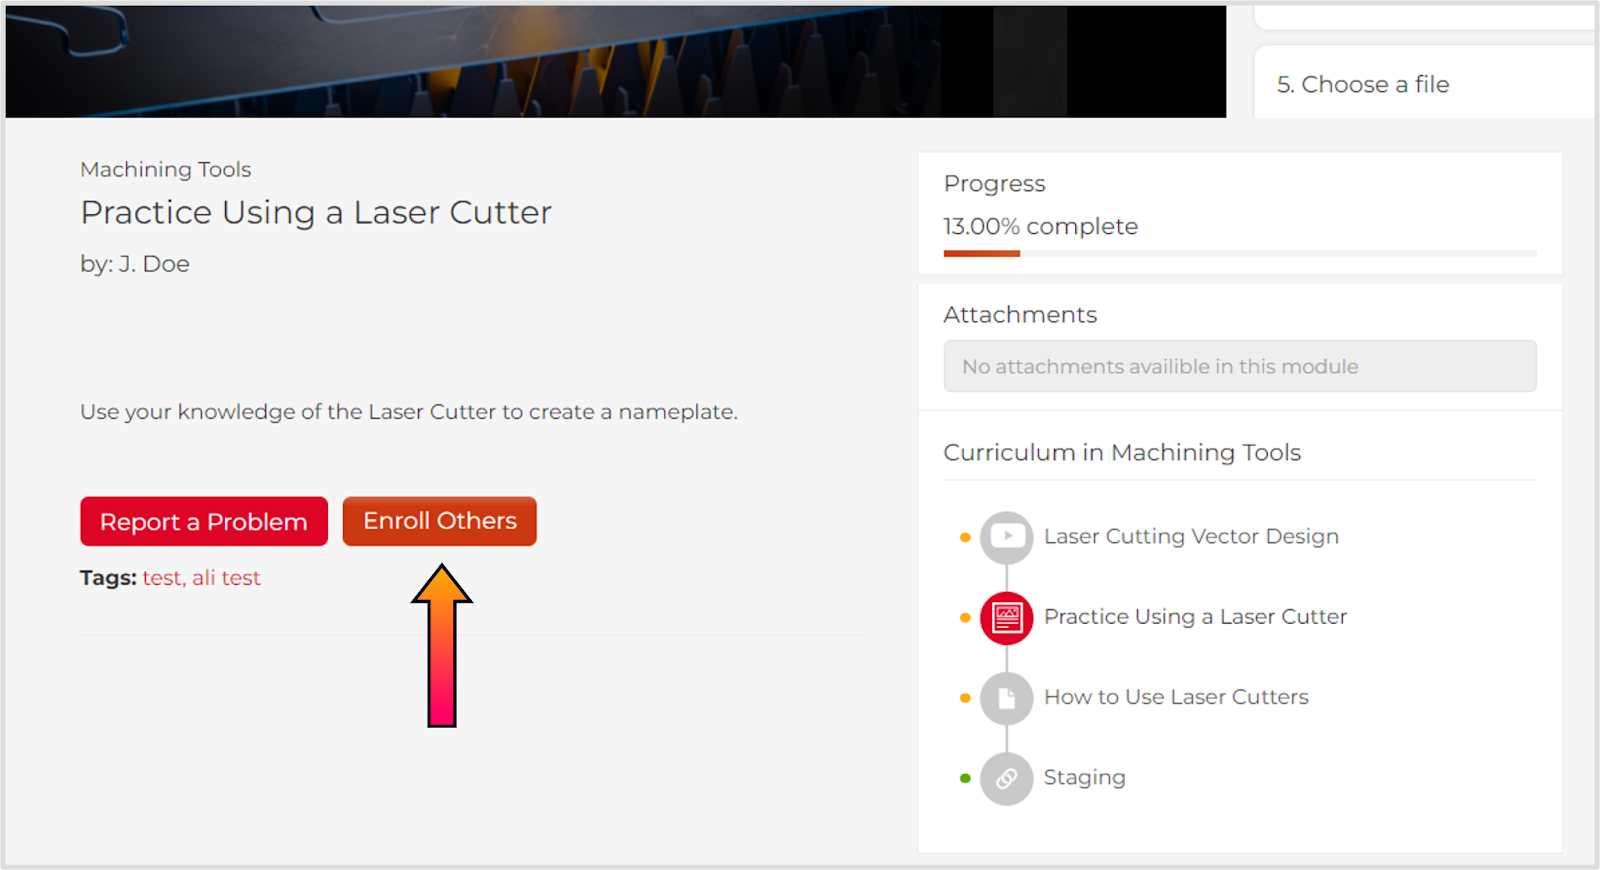
Status: This displays the completion status of the module. If the module is an event, it will also display whether or not the user has RSVP’d for the event.
Attachments: Any attachments added by admin will appear below the module on the left hand side.
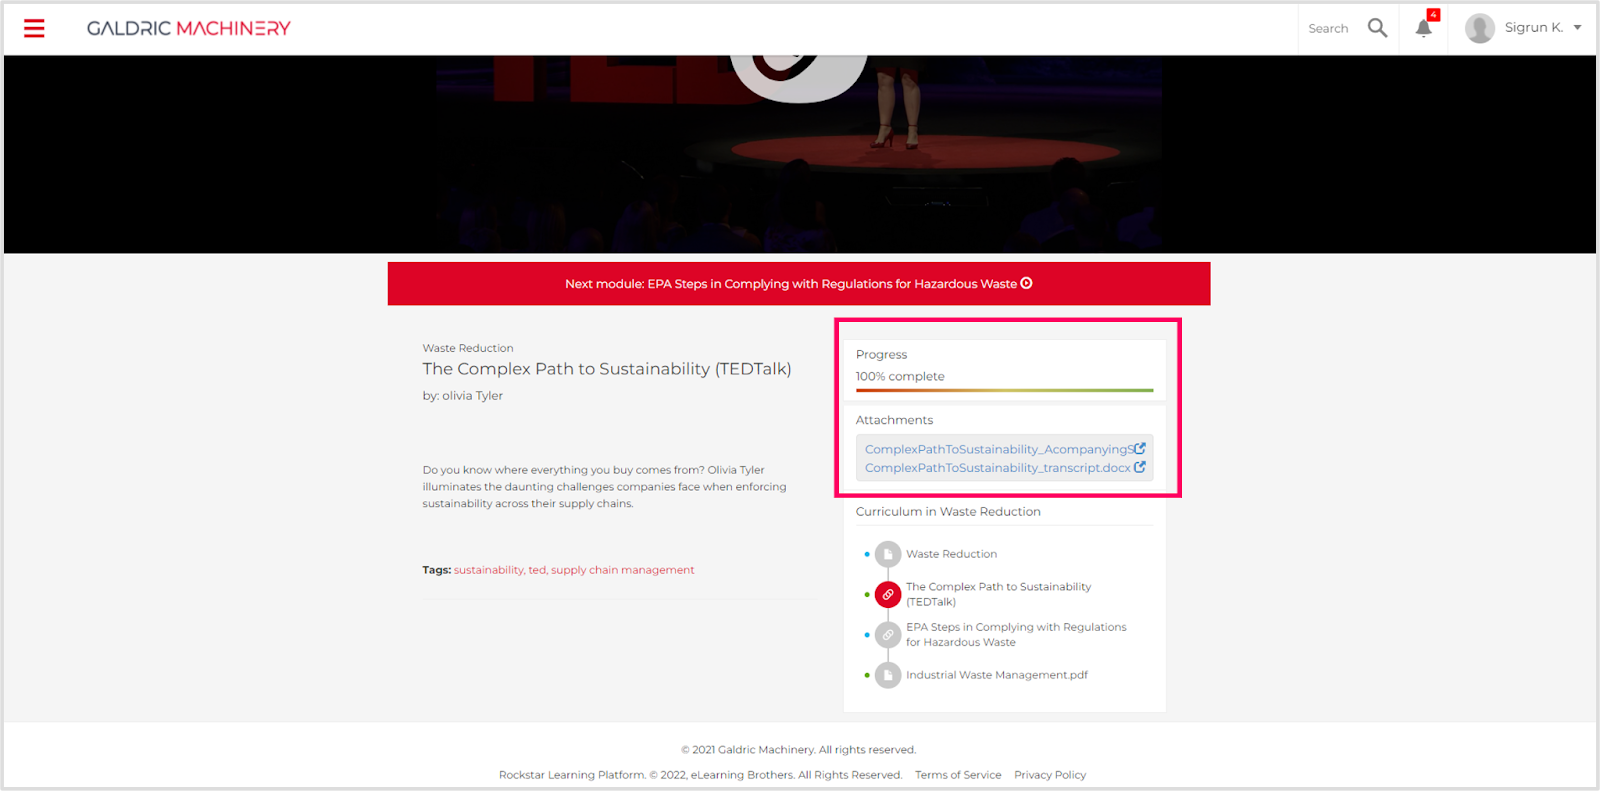
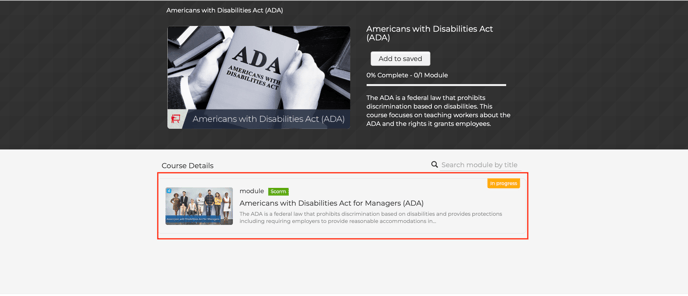
Module List: Below the attachments section will be a list of all the subcourse and modules in this course. Users can select a module title to navigate through the course.
Note: If prerequisites have been enabled, users will not be able to navigate to modules that appear later in the course structure without first completing the earlier modules. However, users can use the module list to navigate to modules they have already completed.
Advanced Module Page Features
Call to Action Button: Admins can add a call to action button that will appear below the description of the module. This button can link to a URL outside of the Rockstar Learning Platform.
Related: To learn how to enable the “Call to Action” button, visit How to Edit/Fill out Module Details pages for Uploaded Modules.
Enroll Others: Only Admin Users will see the "Enroll Others" button. Selecting this button will bring Admins to the "Enrollments" tab on the Admin Page, where they can enroll additional users.
Related: To learn more about enrollments, visit the Admin Manually Enroll Users in Courses article.
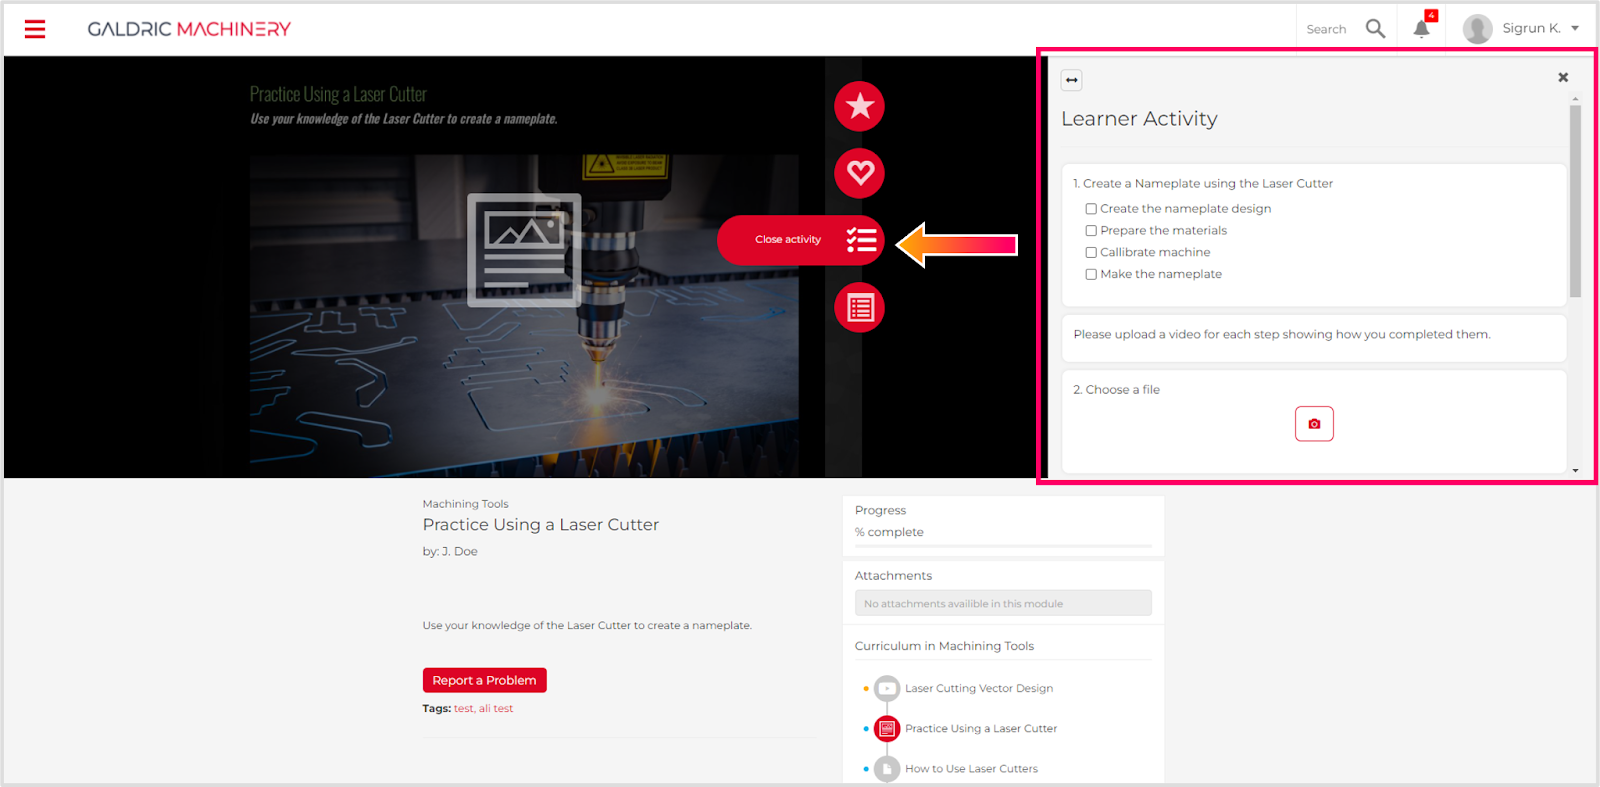
Learner Activity: Learner activities that have been added to the module will appear on the right-hand side of the content window. Users will also be able to close the activity if they wish to have a larger content window using.
Related: To learn more about creating a learner activity go to Learner Activities.
Timestamped Commentary: Timestamped complementary is only available for Youtube and video modules. If an administrator has added timestamped commentary to a video module, users need to select the speech bubble icon to view the commentary.
Related: To learn more about timestamped commentary, visit Add Timestamped Commentary to Video Modules.
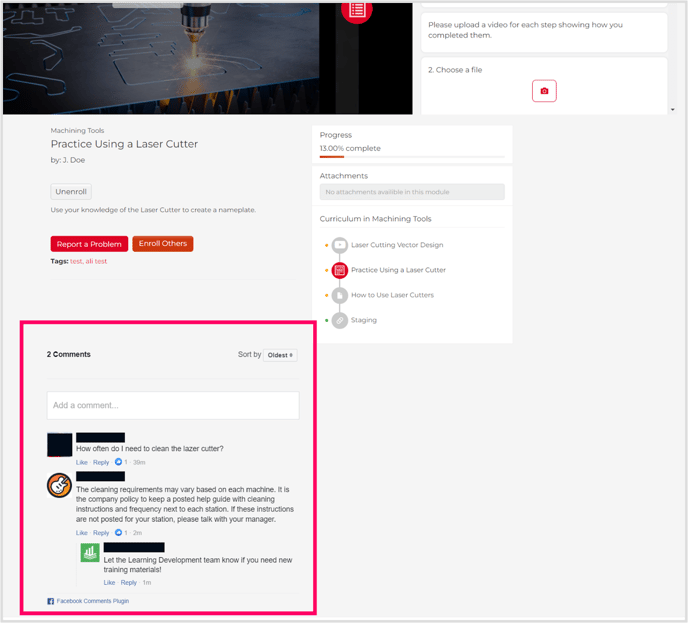
Comments: Comments can be turned on and off on each module, individually. The comment section allows admins and learners to interact with each other and discuss the module.
Note: Learners must be logged in to a Facebook account in order to leave a comment. Third-party cookies must also be enabled on the Rockstar Learning Platform.
Related: To learn how to activate the comment section in your platform, visit Allow Users To Comment on Modules using Facebook-Powered Commenting.