Learn how to collect information about your users by creating custom user data fields in the User Details tab. Then learn how to register a large group of users at once while automatically collecting this user data.
Dec 1, 2023
How to Create Custom User Data Fields
By default, the Rockstar Learning Platform collects users’ first names, last names, and email addresses when they are enrolled. Admins can collect additional user data (e.g. phone number, office location, etc.) by creating custom data fields in the User Data tab.
Notes: Admins can create up to 10 custom data fields.
Step 1: Create a Custom Field
Navigate to Settings in the Admin portal and select the User Data page. Type the name of the new custom field into the textbox under “Name.”
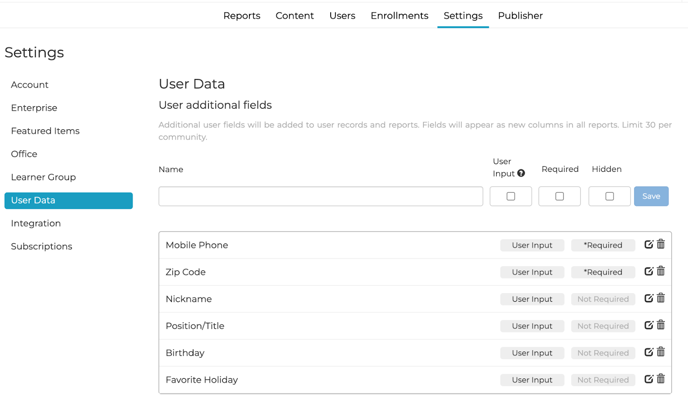
Step 2: User Input
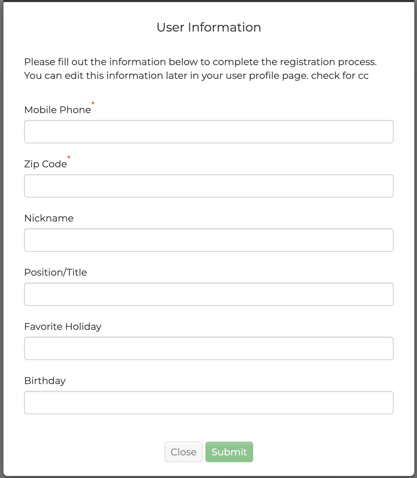
Checking this box will allow users to input information into specified fields on a prompt page the first time they log in, and edit the fields in their “Edit Profile” section.
Note: This is what the Prompt Page would look like for a user logging in for the first time.
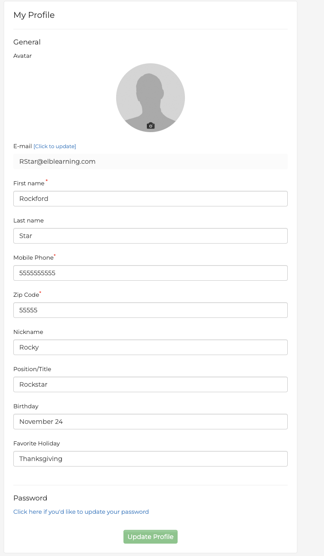
Note: This is what the “Edit Profile” section would look like for a user.
Note: The “prompt page” can be customized using the Custom Copy for a Prompt Page section below the User Data Fields.
Step 3: Require for Users
To make this field required for all users entered into the system, check the “Required Box.” If checked, this field will need to be filled out every time a user is added to the system (add, invite, batch upload, user registration page).
Note: If a new “required” custom data field is created, the system will not allow admins to edit and update existing users without putting a value in the newly required field; unless it’s a User Input field.
Step 4: Save
When done, hit “Save” to add this field to your platform.
Note: Data collected from the additional fields will appear in the user's profile and in the reporting exports. The additional field data does not appear in the reporting tab.
Custom Copy for a Prompt Page
The text you enter here will be displayed on a Prompt Page the first time a user logs in.
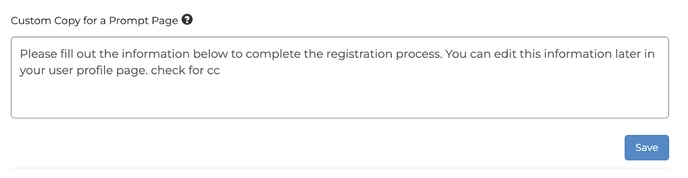
Note: The Custom Copy for a Prompt Page will only display if User Input fields have been created.
How to Create a Registration Page
Registration pages can be used to register a large group of users that need access to the same media. After new users have filled out the required data fields on the registration page, they will automatically be logged into your platform with access to the correct media
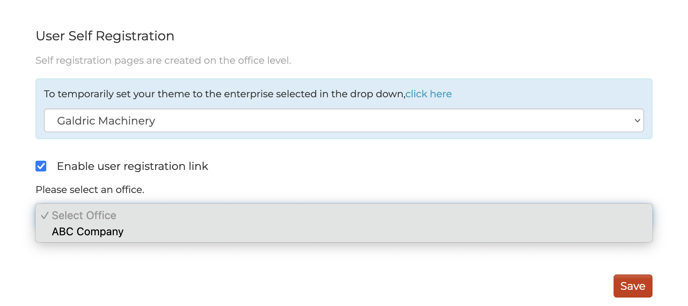
Step 1: Setup
Navigate to Settings in the Admin portal and select the User Data page. Under User Self Registration, select the Enterprise associated with the registration page you are creating.

Note: You must create or choose an office for your users to be assigned to in order to create a registration page.
Step 2: Create a Hyperlink
Click the "enable user registration link" box to create a hyperlink that will lead your clients to a registration page.
Step 3: Customize Your Registration Page
Select your office (see the Offices Settings article), URL, learner group (see the Learner Group Settings article), custom text copy, and desired custom data fields.
Note: If a custom field is marked as required, then it will automatically be added to your registration page.
Step 4: Protect Your URL (Optional)
Checking “Use token in URL” will add a unique code to the end of your registration link, for additional security. For example:
- URL without token: test4.com
- URL with token: test4.com/di73ifjnh722
Note: Using a token makes it harder for people to guess your registration URL.
Step 5: Save and Review:
Click the save button at the bottom of the page to create the registration link. The link will appear at the bottom of the page. If you need to make changes to the registration link settings, you can do so at any time. Remember to click the save button after any changes are made.

Note: You can review your registration page by logging out of your platform and using the link created. If you are logged in to the platform, you will not be able to view the registration link.
Sample Enrollment Page
