Please reference this post for files released April 2019 or earlier.***All template files are tested using modern browsers, such as Chrome and Firefox. We do not support or test using Internet Explorer.*** For previous templates, we combined all our coordinating templates (aka: Styles)—layouts and awesome interactions into one download file called a Course Starter. Each Course Starter has a different design and is packed with features like xAPI reporting, responsive mobile design, and pre-built interactions, so you can get more done in less time. Our new Course Starters for Storyline 3 / 360 and Captivate 2019 feature some changes on how we approach custom xAPI statements. Since each xAPI statement has at least 3 parts—and, each of those have at least 2 values themselves—this can get cumbersome very quickly. We felt this to be true in our templates. And, so did a few of our users. In response, we decided to simplify our xAPI statements a bit. Now, all you need to do to get custom xAPI statements from your eLearning Brothers templates is enter a verb ID and a verb display variable on an interaction, and you're good to go. Nothing else needed. We're tapping into the information that each tool is already providing with its out-of-the-box statements to avoid needing to enter redundant information. Let's look at how our updated xAPI statements work in the tool.
In Captivate, we use several system variables to set up our custom statements.
1.) The Activity Identifier
We use the activity identifier that you enter in the publish settings as the basis for all our custom statements.
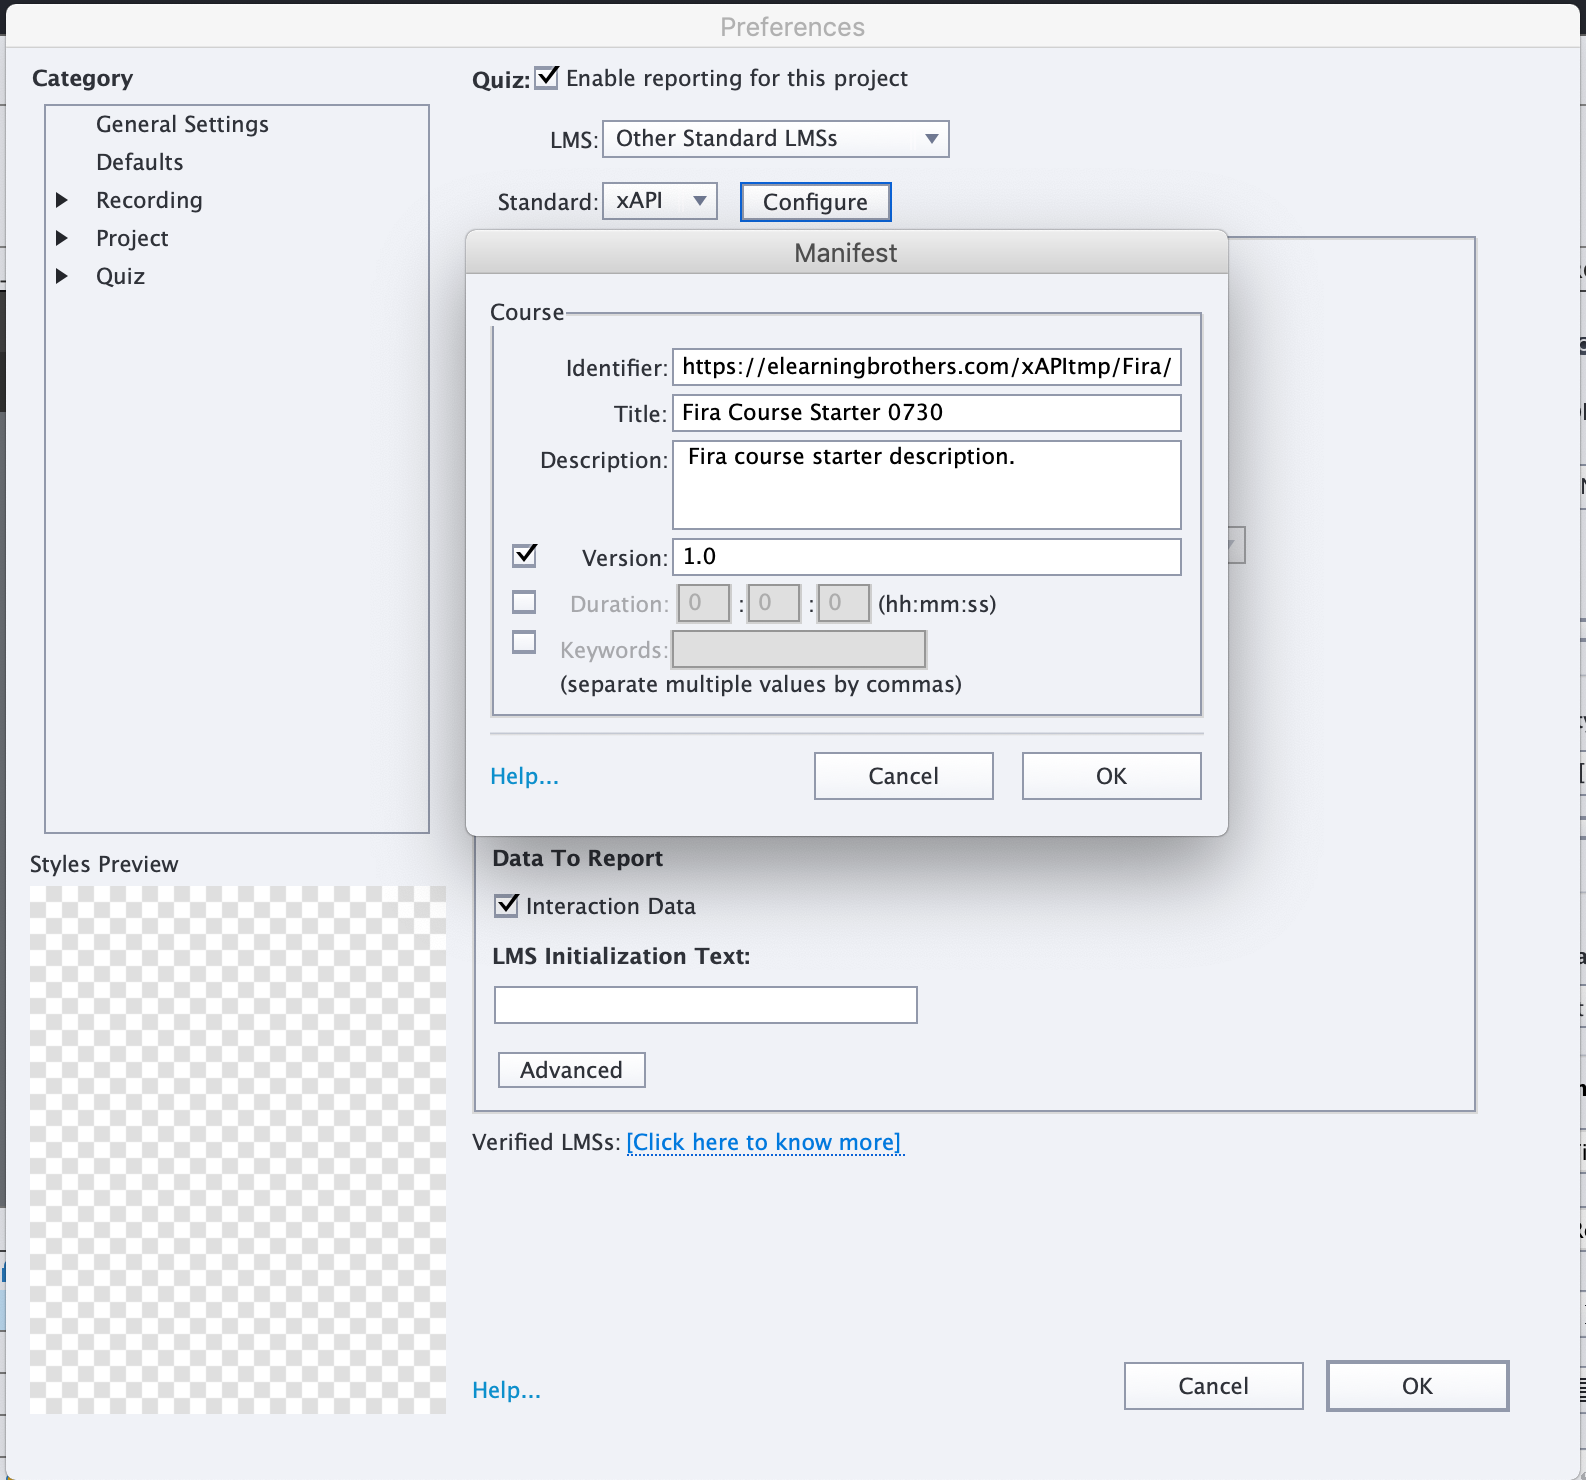 Then, set it and forget it. We'll pick it up from there.
2.) The Current Slide Name
We use the activity ID variable together with the system variable for the current slide name to create a unique ID for the slide the learner is on. It matches the slide ID that Captivate uses on its "experienced" statement for the current slide.
We use this slide ID: as the base for individual object statements; as the object ID for any slide-level statements (like, "Susan mastered the drag and drop interaction"); and as the parent element in our custom statements' context blocks. This last bit allows us to map each custom statement to the slide it lives on, so you can get some deep, object-level analytics from your LRS.
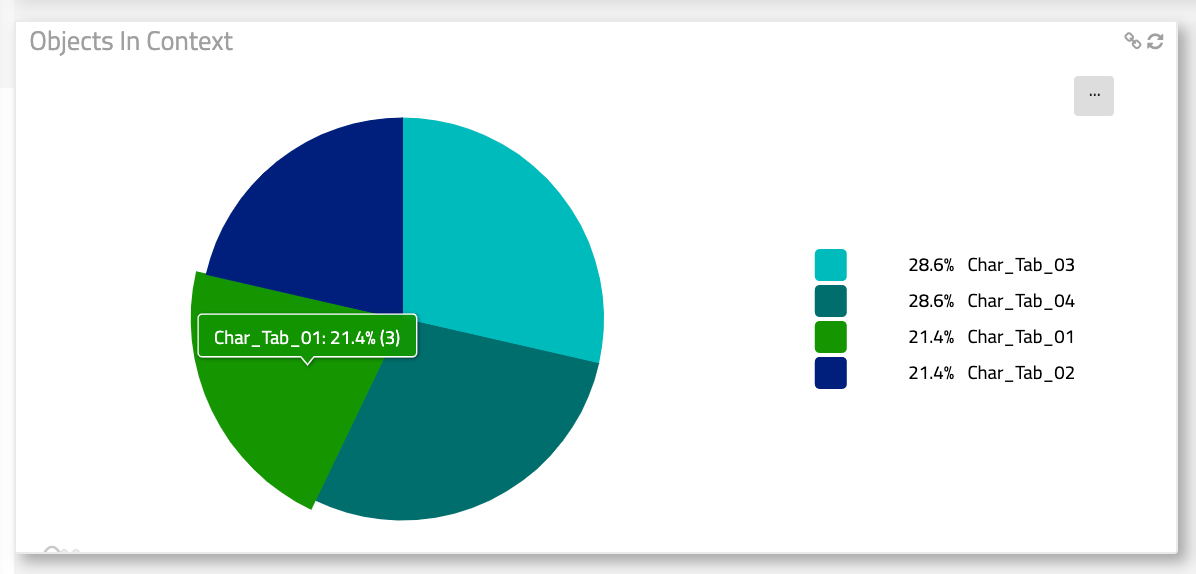
3.) The Current Object Label
Now is where things get tricky.
To make our object-level IDs for custom statements, we basically just need to take our activity ID, add the current slide name to that, then tack on the name of the item that our learner is interacting with, and URL-itize it.
Originally we made this a manual process because there aren't system variables to explicitly track current objects in Captivate; you'd need to enter a name and ID for each object you wanted to track.
In a small interaction, this is no biggie.
In something like a glossary, where you're tracking 26 different button names (or more), this can be a big headache. That's potentially 52 different touch points on 26 different actions to set 1 value.
But again, no system variable to pull those values from.
For this update of our course starters, we opted to automate this value using Javascript.
Basically, we're taking advantage of how Captivate outputs its files.
Here's a real oversimplification for instructional purposes:
Captivate's output is HTML5—it basically creates a web page for each slide in a course.
That web page is made of individual DIV elements.
Each object on screen in an interaction gets its own DIV element.
Each DIV element gets an ID value, which Captivate generates using the related object's name/label properties.
We take advantage of that to automate the object-level IDs of our statements.
We use some simple Javascript to get the value of a div's ID based on the last element a learner interacted with. That value is then URL-itized and used as the Display and the tag for our ID value for the object*.
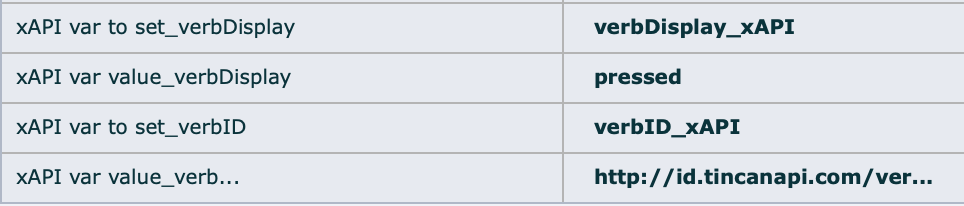
All you need to do is set the xAPI verb.
As of now, this is a free-form field; put whatever you want into the variables here.
Check here for a full list: http://xapi.vocab.pub/verbs/index.html
One thing we've done to make this easier though, is add the actions that set these values to Shared Actions, instead of Advanced Actions.
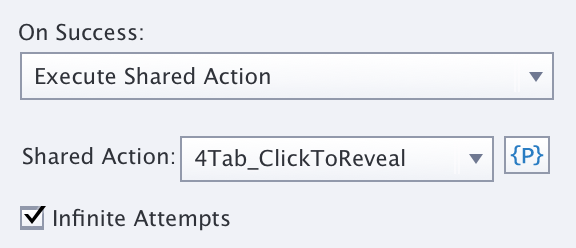
This keeps the advanced actions pane decluttered, and allows you to get at the parameters in an object's actions more easily.
Just click the parameters button adjacent to the object's assigned action in the properties pane, then start adjusting.
We've tried to add clear descriptions to each parameter.
After you've set the verb values, publish to xAPI and deploy as you would.
You'll get custom xAPI statements with a negligible amount of work, tied contextually to one another, and the course as a whole.
Easy peasy.
This article last reviewed April, 2019. The software may have changed since the last review.