- ELB Learning Knowledge Base
- Asset Libraries
- PPT Template Library
-
Lectora®
- Quick Win Tutorials
- Getting Started
- Modular Development (ModDev)
- Quick Guides
- Best Practices
- Navigating the Workplace
- Building a Title
- Importing Content
- Working With Text
- Working with Images
- Working With Objects
- Actions and Variables
- Tests, Surveys, and Questions
- Working with Web Windows or HTML Extensions
- Publishing a Title
- Creating Web-based, Accessible Content (Section 508/WCAG)
- Lectora Layouts
- Managing Titles
- Managing your Assignments
- Managing Your Notifications
- Communicating
- Admin Guide
- Lectora Player Skins
- Lectora Interactions and Scenarios
- Games
- Misc.
- Programming
- General
- Using Tracking for Progress, Status, etc
- Working with BranchTrack
- Trouble Shooting
- Working with Audio and Video
-
CenarioVR®
-
MicroBuilder™
-
The Training Arcade®
-
Asset Libraries
-
Rockstar Learning Platform
-
Rehearsal
-
Off-the-Shelf Training
-
ReviewLink®
-
The Learning Creation Studio
-
CourseMill®
-
General Topics
-
xAPI
-
Template Styles
-
Misc.
-
Articulate Storyline
-
Customizable Courseware
-
Course Starters
-
Camtasia
-
Group Administration
-
General
-
Can't find the answer? Ask our Customer Solutions team.
How to Edit Animations
In this How To, you will learn: How to edit or adjust existing animation, delete animations, and change animations.
Covers fading in and out, motion paths, rotation/spinning, and reveals.
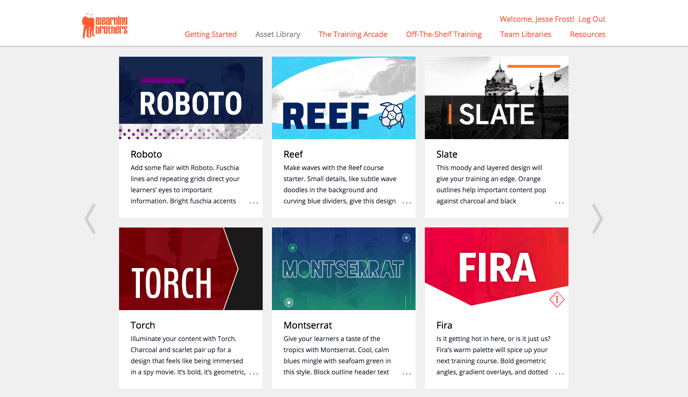
- Pick a style from the PowerPoint Library.
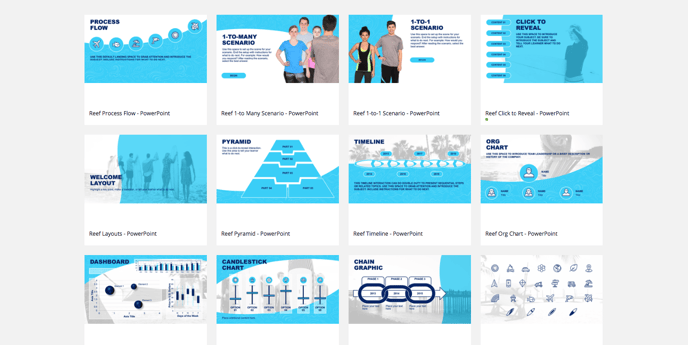
- Download files you wish to use.
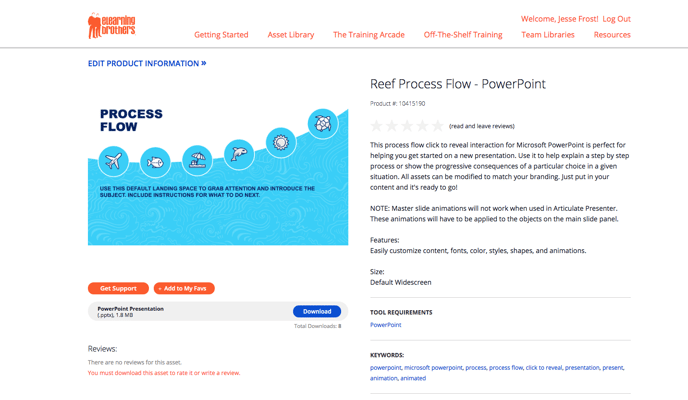
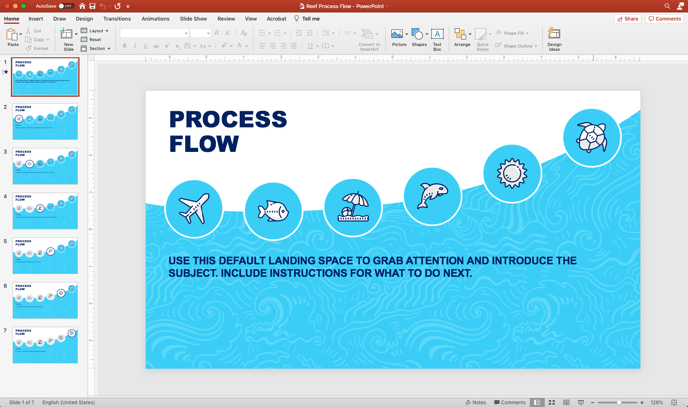
- Open the file in PowerPoint.
- If you are adding these slides to another file follow these steps here ».
To edit or adjust existing animation:
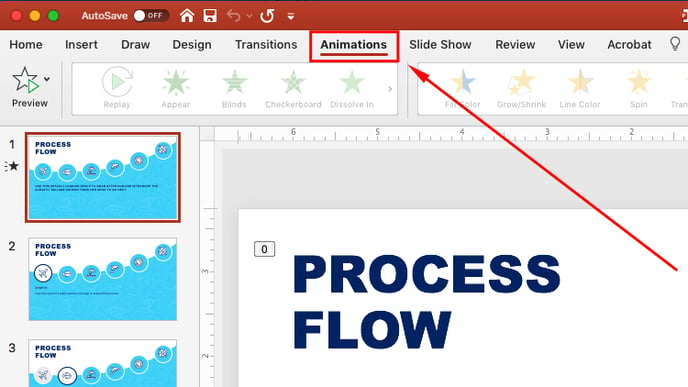
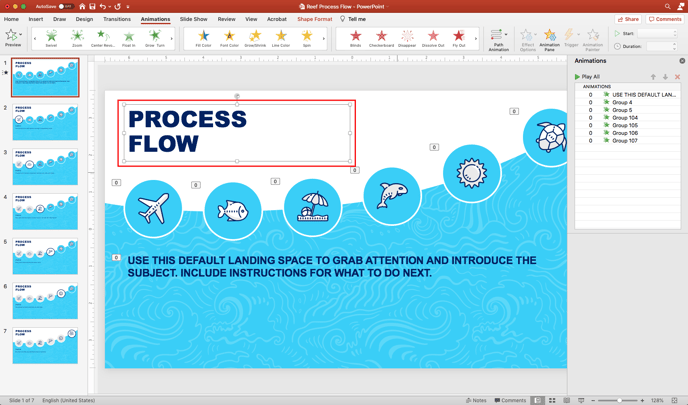
- Navigate to the Animations tab.
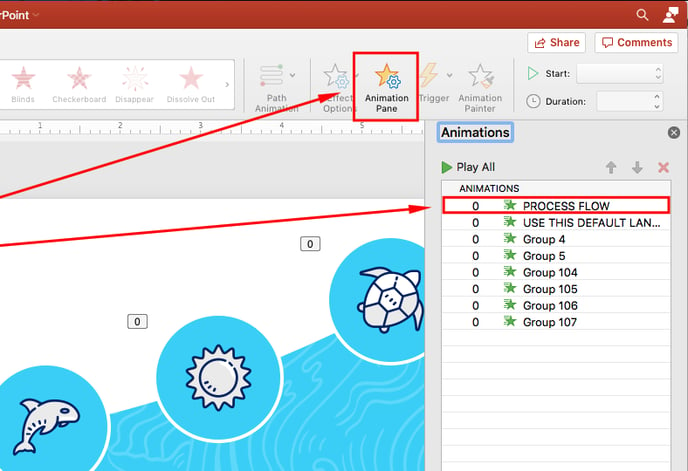
- Click the Animation Pane button to open the Animations Pane along the right side and select animation from the list.
- Use the drop down menus below the animation list to adjust existing animations.
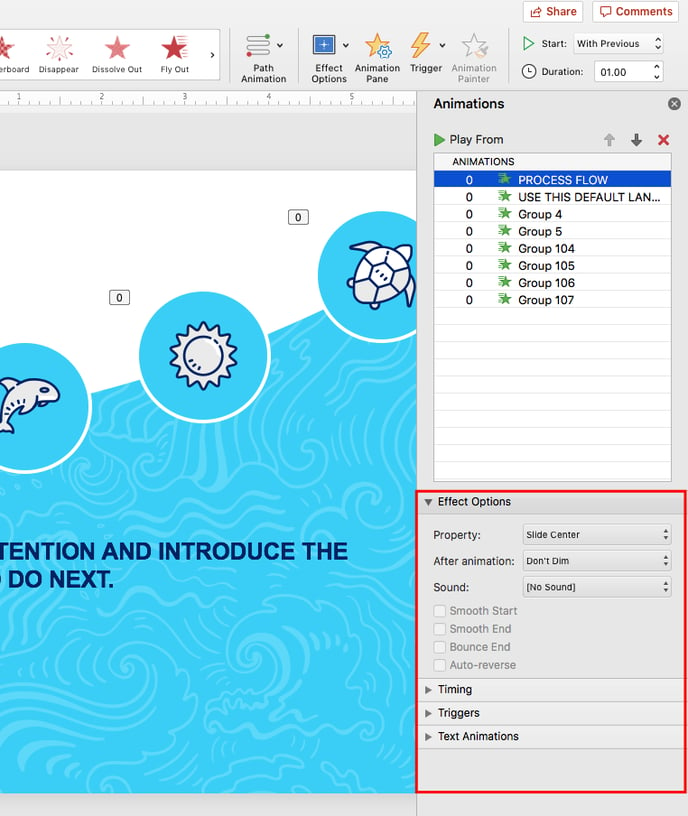
- Adjustment options include Effect Options, Timing, Triggers, and Text Animations (if the object is a text box).
- By clicking on each of these sections they will expand/drop down so that you can better control the animation.
- Adjustment options include Effect Options, Timing, Triggers, and Text Animations (if the object is a text box).
To delete animations:
- Navigate to the Animations tab.
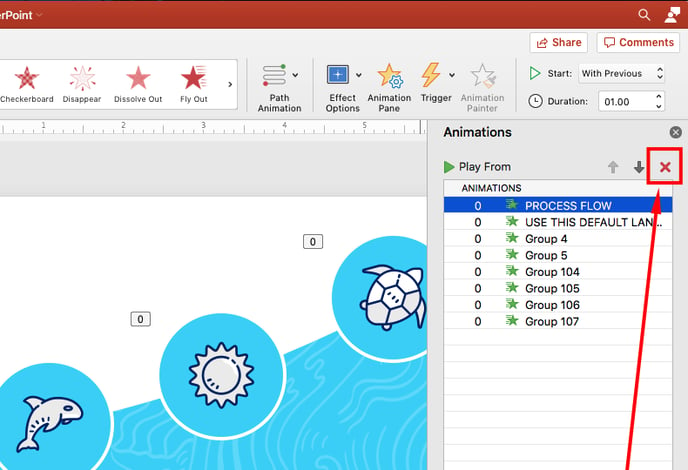
- Click the Animation Pane button to open the Animations Pane along the right side and select animation from the list.
- Press red X at the top right or press the delete button on the keyboard.
To change animations:
- Select the object you want to change the animation of and delete the existing animation for that object.
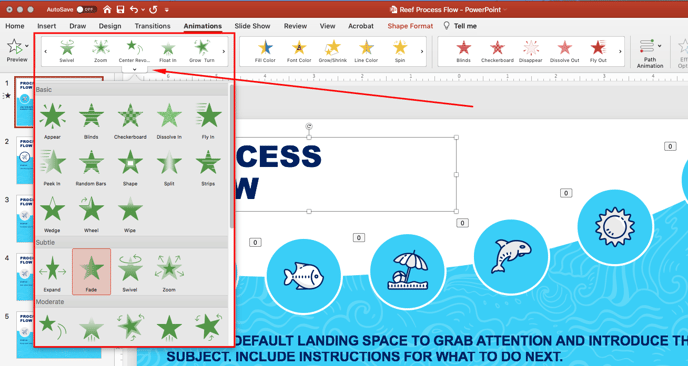
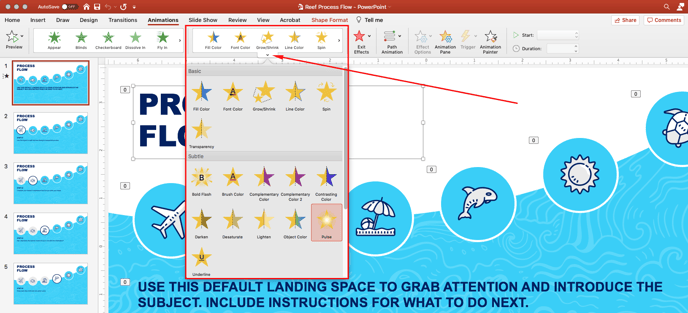
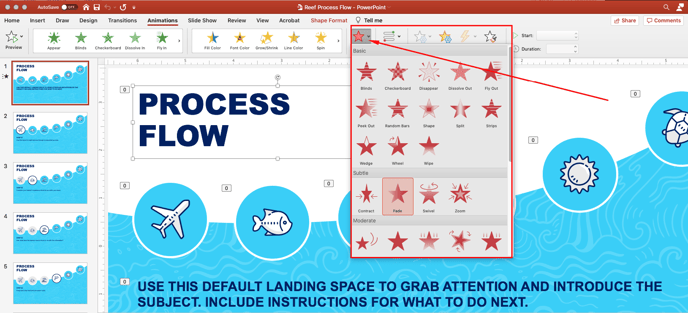
- Choose an ‘Effect’ animation from any of the four drop down menus in the ribbon.
- Animations in the left-most drop down (colored green) are Entrance Effects (e.g., Fly In, Fade, Rise Up, and Basic Zoom). An Entrance animation determines the manner in which an object appears on a slide; for example, an object can move onto a slide.
- Animations in the middle-left drop down (colored yellow) are Emphasis Effects (e.g., Grow/Shrink, Spin, Transparency, and Pulse). An Emphasis animation does something to draw attention to an object; for example, the object can become larger.
- Animations in the middle-right drop down (colored red) are Exit Effects (e.g., Disappear, Wipe, Fade, and Sink Down). An Exit animation determines the manner in which an object leaves a slide; for example, an object can move off a slide. NOTE: most of these are similar to the Entrance animations.
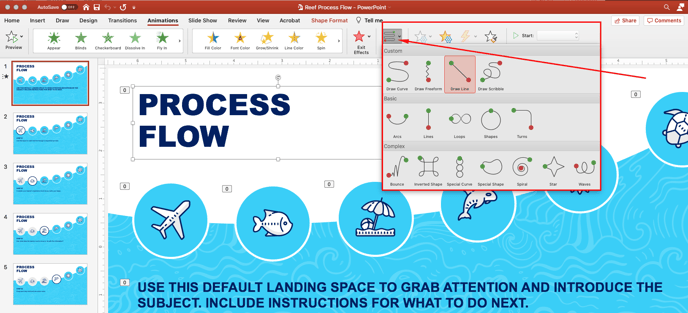
- Animations in the left-most drop down are Path Animations or motion paths (e.g., Draw Curve, Arcs, Bounce, and Spiral). A motion path animation determines how an object moves around a slide; for example, an object can move from left to right.
- Animations in the left-most drop down (colored green) are Entrance Effects (e.g., Fly In, Fade, Rise Up, and Basic Zoom). An Entrance animation determines the manner in which an object appears on a slide; for example, an object can move onto a slide.
- Use drop downs on the right in the animation pane to adjust timing, duration, delay, and other animation options.
- IMPORTANT NOTE: Including subtle animations in your presentation can make it more visually appealing and help keep the learner engaged with your content. However, adding animation to everything or having flashy distracting animations can have the opposite effect.
- Don’t forget to save!
Repeat the steps above until your presentation’s animations are complete.
Pro Tip: Go back through your course/presentation in “presentation mode” to check that your slides are in the correct order and all your animations are working correctly.