Grouping Objects and Actions in Lectora and Lectora Online
Just like my closet before spring cleaning, sometimes the objects in your Lectora and Lectora Online Title Explorer need a little organization. By grouping objects, you combine them, so you can work with them as a single unit. Not only does this better organize your Title Explorer, but it allows you to apply transitions, actions, and properties to several objects at once.
Benefits of Grouping
There are many benefits to using groups within your titles. Some of my favorites are:
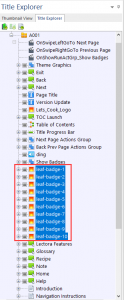
- Organizing object types within the Title Explorer (image groups, audio groups, text groups, etc.)
- De-clutter the Title Explorer to make it easier to work with and see your title structure
- Move, lock and unlock multiple objects simultaneously
- Set transitions on a group of objects one time only
- Execute one action for an entire group of objects
Grouping
Group Objects That Already Exist
Groups can contain all kinds of objects, images, text blocks, audio, and actions. To group a set of objects that are already created, complete the following:
1. Select the objects within the Title Explorer or the work area. Hold down the Ctrl key (Windows) or Command key (Mac) to select multiple objects or use the Shift key (Window and Mac) to complete a list grab (objects in a sequential order).
2. While the objects are selected, right-click and select Group from the context menu.

3. Objects are now grouped and can be worked with as a single unit. Rename the group to provide more clarity or easily locate it later and adjust group properties as necessary.

Adding a Group to Your Title
If the objects you wish to group are not already created, you have the ability to create a group first and add objects to it later. To add a group to your title, complete the following:
1. Select the location in the Title Explorer that you want to add a group. Don’t forget, groups are great for organizing objects at the title, chapter or section levels too. You’re not restricted to just the page level.
2. There are several ways you can add a group:
- From the Home ribbon, click Group
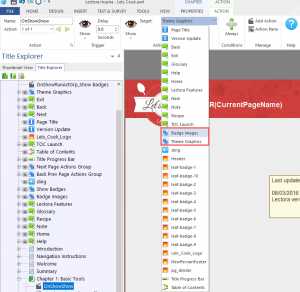
- From the Insert ribbon, click Group (shown below)
- From the Position & Size ribbon, click Group
- Use the shortcut Ctrl+5

3. You can drag and drop existing objects from the Title Explorer into the group, or keep the group highlighted when adding new objects to the title.
Important Note: Once objects are grouped, you can’t move individual objects within the group. For example, if you have a text block that is grouped with other objects, all of the objects will move when you try to move just the text block. To move objects individually, select the object from the Title Explorer or work area. Holding down the Alt key, click and drag the object to the desired position on the page.
Ungrouping
Ungrouping Objects
When spring cleaning hit last year, I organized all the clothes in my closet by color. Using the colors of the rainbow everything was organized using ROYGBV (red, orange, yellow, green. blue, violet) with white pieces before red and black and gray pieces after violet. But it wasn’t always like that. Previously I had been lumping white, black, and gray together which, if I’m being honest, was half of my closet to one side. So sometimes it may be necessary to ungroup and rearrange pieces in your closet, as well as, in Lectora.
When developing a title, your design or logic might change and you need to ungroup a set of objects you had previously grouped. To ungroup objects, complete the following:
1. Right-click the group icon in the Title Explorer on the group of objects you want to ungroup.
Select Ungroup from the context menu.
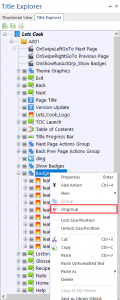
The objects have been ungrouped. You can now work with each object individually.
Actions
Using Your Group as a Target
You can easily call upon a group (whether that’s to show, hide, move, resize, etc) by selecting the group from the Target drop-down.
Action Groups
When cleaning out your closet multiple actions are necessary. You might need to make sure everything is on a hanger, then remove a color set, and ultimately replace it. back into your closet in a new location. Lectora action groups give you the ability to fire multiple actions one right after another.
Groups can contain all kinds of objects, images, text blocks, audio, and actions. When a group consists entirely of actions, it is referred to as an action group. The keyword being “entirely”. Mixing and matching actions with objects will cause the actions to fail.
These groups give you the ability to perform multiple actions using one trigger; Run Action Group. This is especially helpful when you’re limited to only one action in the Lectora or Lectora Online interface (question feedback, synchronizing events, etc). The actions should be placed in firing order from first (closest to the group) to last (at the end of the group) and are fired in sequential order unless delays are used.
To add an action group inside your course:
- Follow the steps of combining the actions into a group (either existing or after the fact). See the Grouping section for more details.
- Add an object or place the action at a structural level which will trigger the action. (The example below is at the title level of course that will enable swiping actions).
- Specify that you want to Run Action Group and select your action group from the Target drop-down.

This article last reviewed Dec, 2015. The software may have changed since the last review. Please visit our Release Notes to learn more about version updates.