We’ve taken a new approach to handling actions in Captivate: we now use Shared Actions for our interactive slides. We save and include the base advanced action for each, but rely on shared actions to do the heavy lifting in our templates. This may be a new feature to some Captivate users, and may be a breath of fresh air to those unfamiliar. Rather than hunt and peck through advanced actions and targets in the main pop-up, you can now simply highlight an object and navigate to the properties pane to affect its function.
Easily set targets with dropdowns, and ignore parameters that you don’t need to change (we’ve limited those from editing so you don’t need to worry!).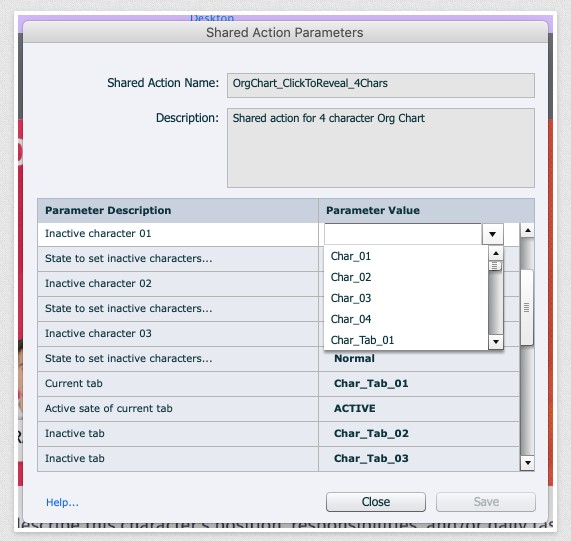
You can also re-use those actions across projects by pasting from one project’s library to another.
**In certain cases where an action will not be reused in a slide (i.e., a start button), we will use a standard advanced action.
- Click to Reveals:
With rare exception, our click to reveals, timelines, pyramid interactions—basically anything that has a "tab" and launches content—work very, very similarly in each of our new Course Starters.
This allows for familiarity and ease of use across different files—if you know how the 4-Tab Click to Reveal works in Fira, you'll be able to easily edit the Pyramid in Montserrat.
All content for all elements is editable. Select an element and type; use the properties pane and select a new picture for images.
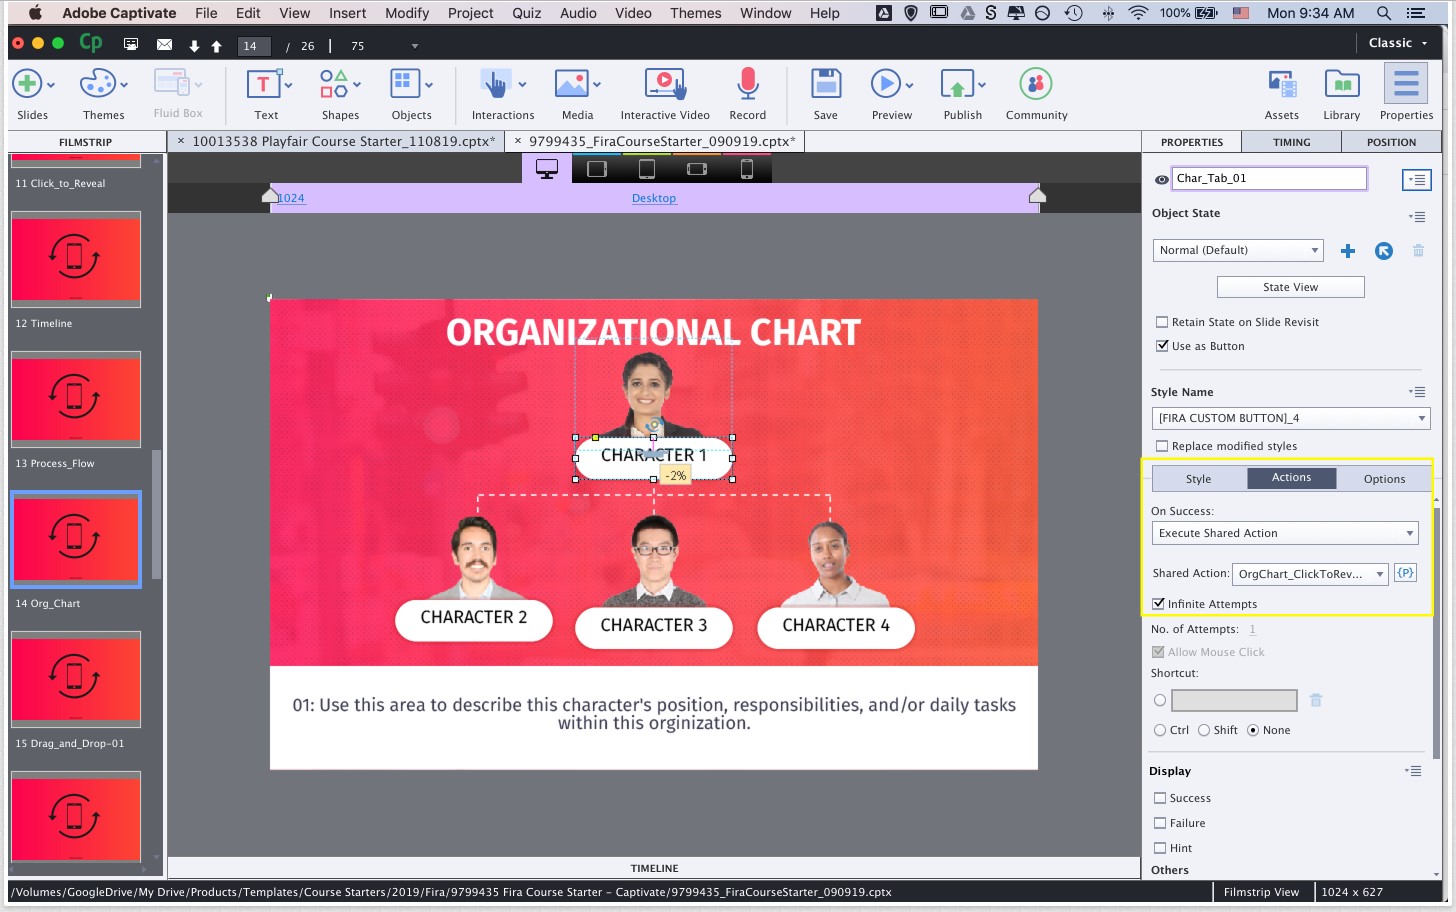
The best way to discover how one of these interactions works is to break apart the shared action. To do so, select a button/object, and then access the actions tab of the properties pane.
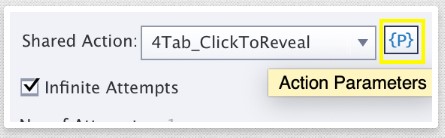
Then, press the parameters button next to the shared action for that object.
On the resulting pop-up, we’ve included a plain-English list of actions that the object is taking, along with a field you can use to edit or adjust the target of that action.
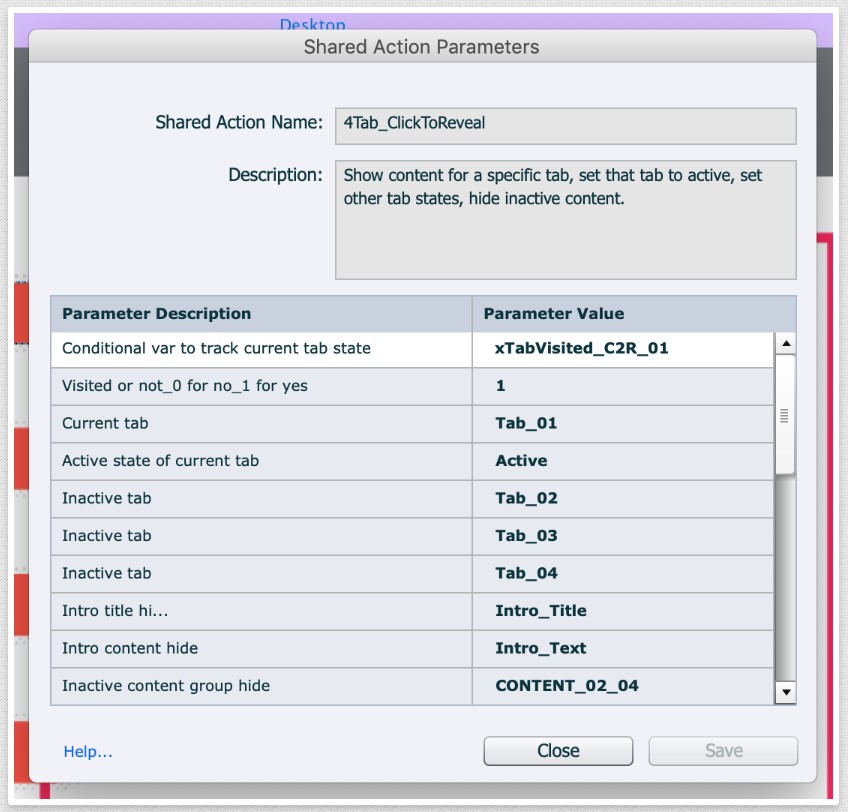
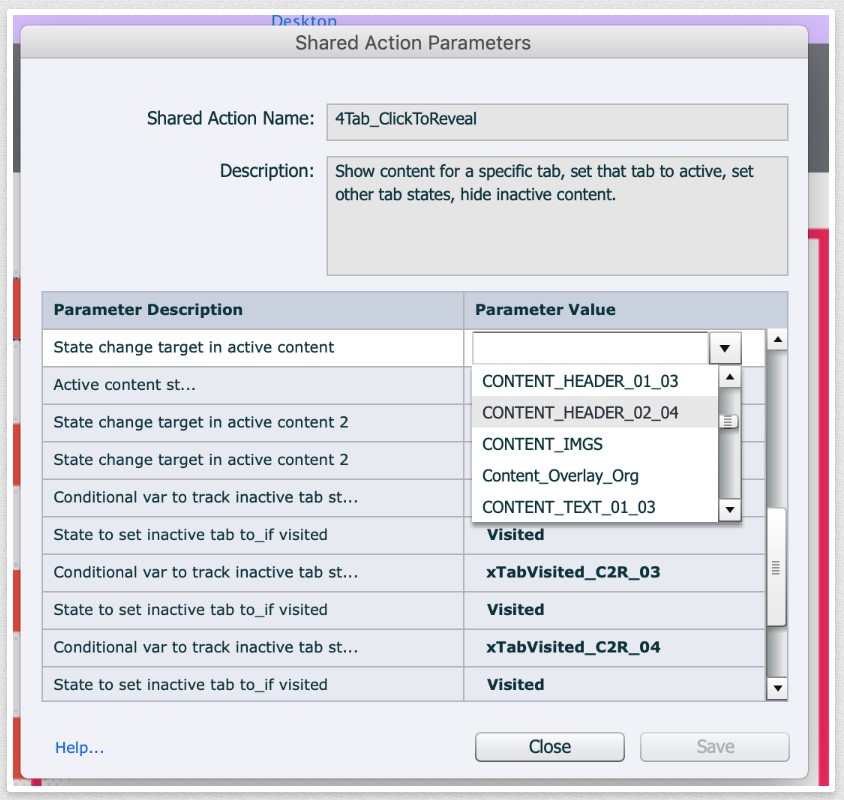
For instance, to adjust which content shows when a button is clicked, we might (in the example below) adjust the parameter value for “state change target in active content” to 02_04 instead of 01_03.
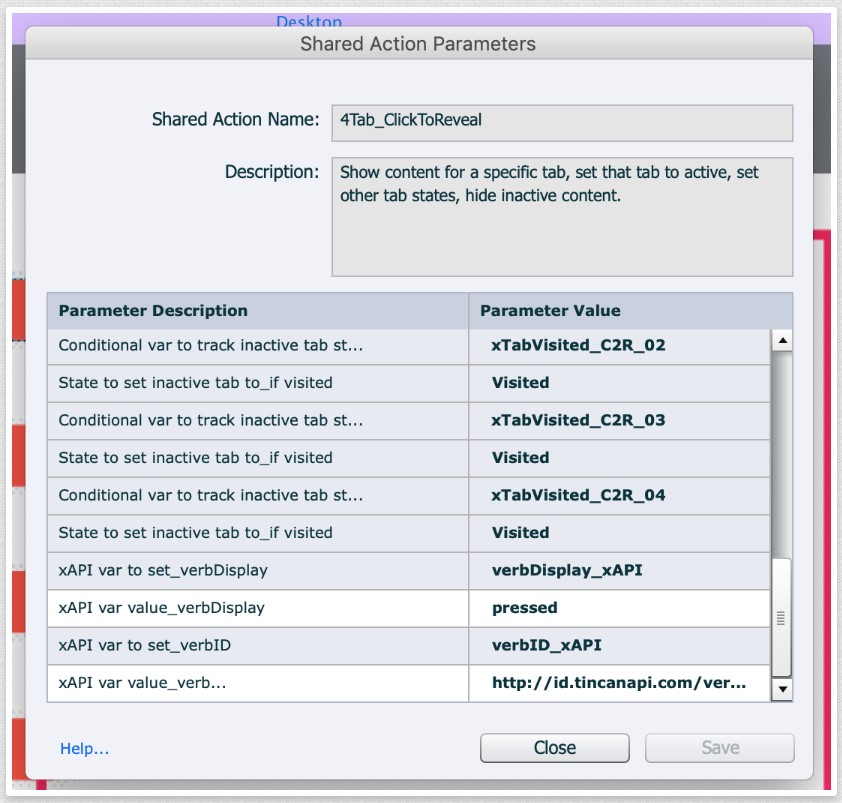
We’ve also included xAPI values for the display and ID values of verbs associated with each action. Just click and type to edit these.
- Text Entry:
This is a freeform text entry interaction that uses Captivate’s text entry field to capture a learner's response. There is also a feedback object that repeats that captured response back to the learner, and provides prescriptive feedback. We also include an xAPI trigger to send that learner's statement to your LRS as an "Answered" statement with embedded response that can be charted rather easily.
To edit content, simply select a text element and type. To replace images, simply select the smart shape that contains the image and reassign the fill using the properties pane.
xAPI triggers are tied to the submit button. Edit the assigned advanced action to adjust the verb ID and display values for the statement.
- Scenarios:
With rare exception, our scenarios will be set up the same way in Captivate.
To edit content, simply select a text element and type. To replace images, use the properties pane. Make sure to check all states!
All behaviors for clickable elements are tied to the action for that element. Edit via the properties pane.
To adjust which answers are correct/incorrect, access the shared action parameters in the properties pane.
- Drag and Drop:
With rare exception, drag and drops will be built using Captivate’s interaction editor. This allows you to edit correct/incorrect pairings very easily, with no variables to concern yourself with.
To adjust correct answers, use the Drag and Drop > Options tab on the Properties pane.
To adjust the actions that occur when a dragger is dropped, select the dropzone, then press the Drag and Drop > Format tab, and select “Object Actions…” Then adjust the advanced action for each.
There are two actions associated with this interaction: a correct and incorrect action.
Each of these control both what occurs on screen after an answer is given and the xAPI values for this interaction. Set the verb ID and verb Display values here.